Using TYPO3 for Small Projects Pt. 3 - Blog Extension

In part three of this guide, find out how to install and configure the TYPO3 Blog extension. Learn how to install and configure the extension using folders, various content types and frontend plugins.
Recap
In Part 1 of this series we installed TYPO3 and chose SQLite for our database. We logged into TYPO3's backend and took a look at some of its features.
In Part 2 we looked at how pages and content are created in TYPO3. We also installed the Bootstrap Package. We installed the extension using Composer and modified our sites look and feel.
In Part 3 we will look at how to install and configure the Blog Extension.
Introducing The Blog Extension
The Blog Extension is a standalone TYPO3 extension that allows you to create and manage blog posts. It's maintained by the TYPO3 GmbH and it's what we use to power this very blog that you are reading right now.
It has good documentation and supports TYPO3 version 13. Note that the Blog Extension currently does not support Site Sets. Though support for this feature is planned for 2025. Once support has been added, part of this guide will be updated to account for this.
Installing The Blog Extension
composer require t3g/blog
Next, we need to run another command,
vendor/bin/typo3 extension:setup
This command executes the required database migrations for the Blog Extension
Automatic or Manual Setup
You can set up the Blog extension in two ways, you can use the Setup Wizard that will create a standalone instance of the Blog (remember Root Pages in Part 2?) or you can opt for the manual setup.
In this example we will configure the extension manually, meaning we will need to create folders for items such as blog posts, categories, tags, etc manually and then tell TYPO3 where they are in the page tree using TypoScript.
Load The Blog Extension
The extension is installed, but we need to load it for our site:
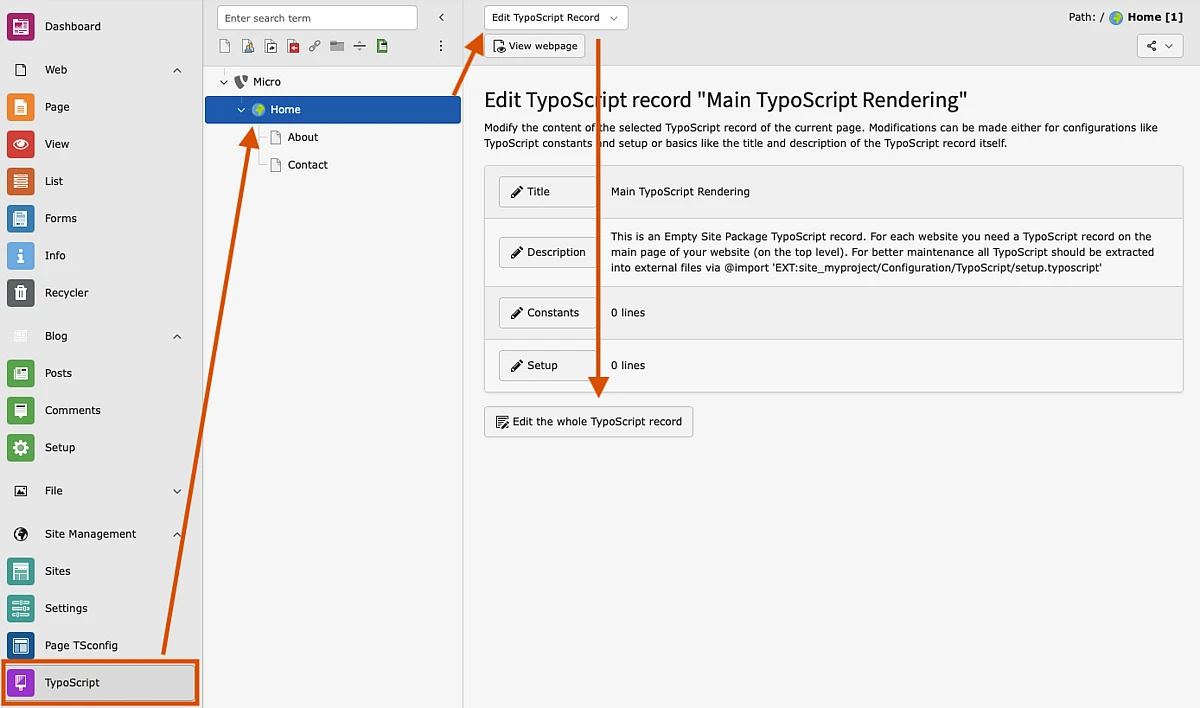
TypoScript > Root Page > Edit TypoScript Record > Edit the whole TypoScript record
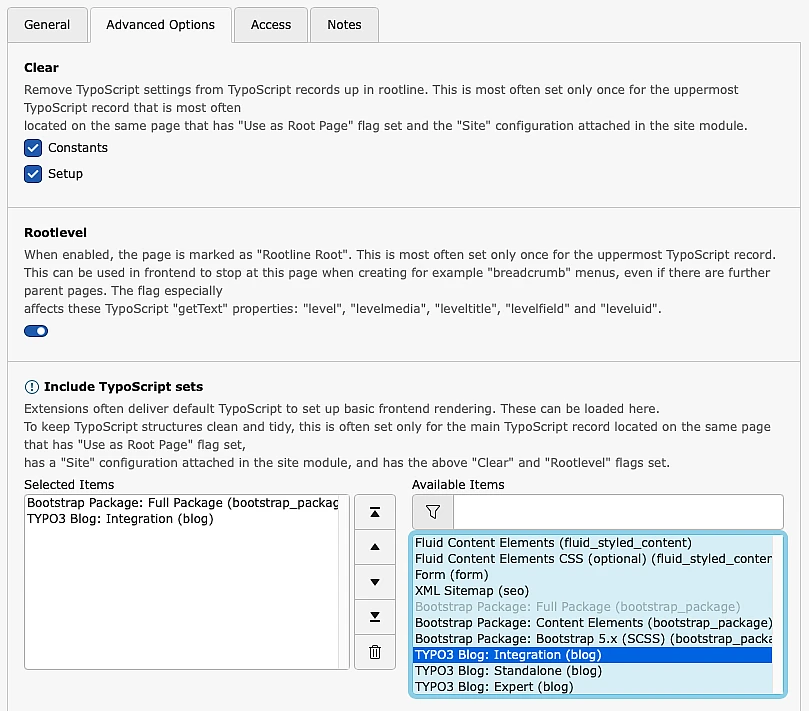
From the Advanced Options tab, select "TYPO3 Blog: Integration"
Save & Exit.
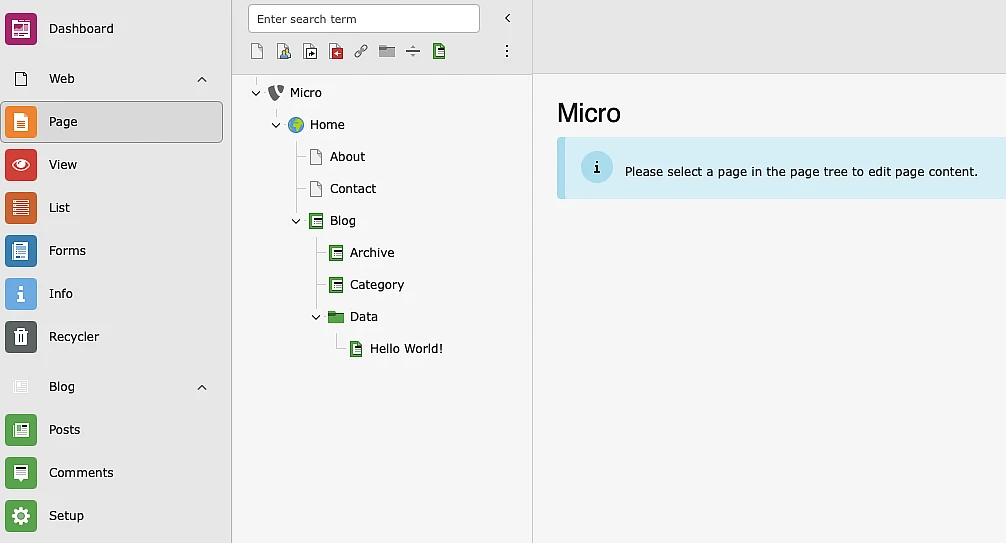
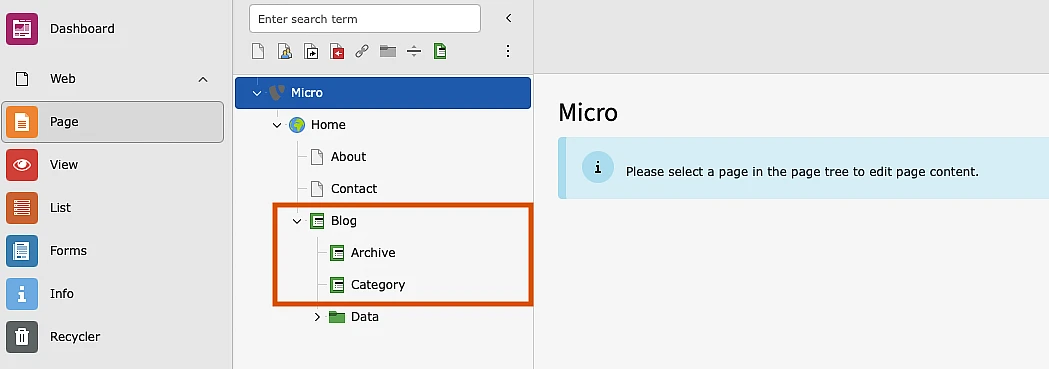
Storing And Categorising Blog Posts
Next we need to create several items in the page tree and we'll eventually want it to look like this:
We will have a Blog page called Blog that will use the List Plugin and will show a list of all our blog posts with pagination.
A data folder called Data, that will contain:
- Blog posts
- Categories
- Authors
- Comments
Two pages:
- Category
- Archive
Each of these two pages will contain plugins showing their respective content. For example, the Category page will contain a plugin that lists all of our categories. And the Archive page will contain a full list of all blog posts grouped by month and year.
The Blog extension also has support for tags - but for this example we won't use them.
Creating The Blog Page
To create a page, go to the page tree and drag the page icon to the page tree and give it a name (Blog).
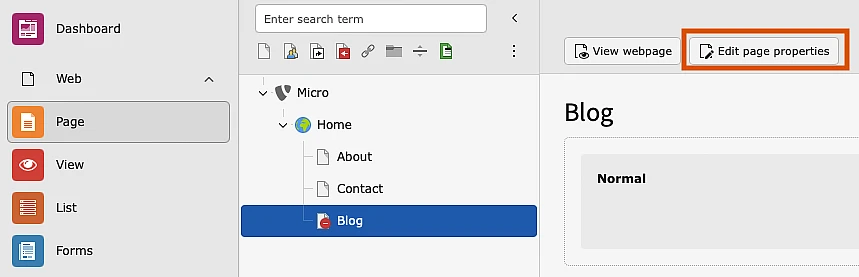
Once the page is created, select the page and then select Edit Page Properties.

Then from the General Tab, change the Page type to Blog Page. Notice the red icon on the new blog page? That means the page is disabled, to enable it - right click on it and select Enable.
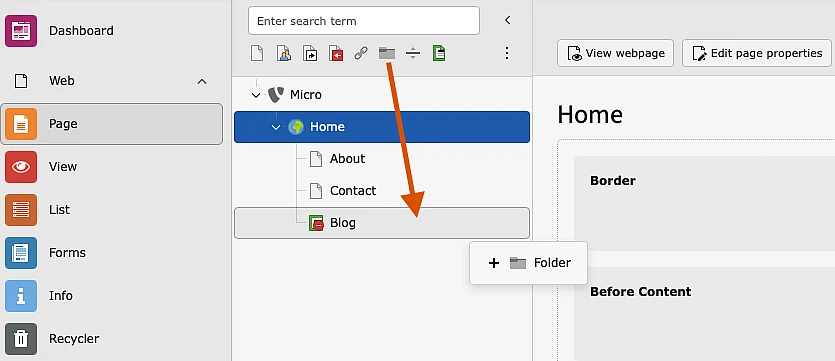
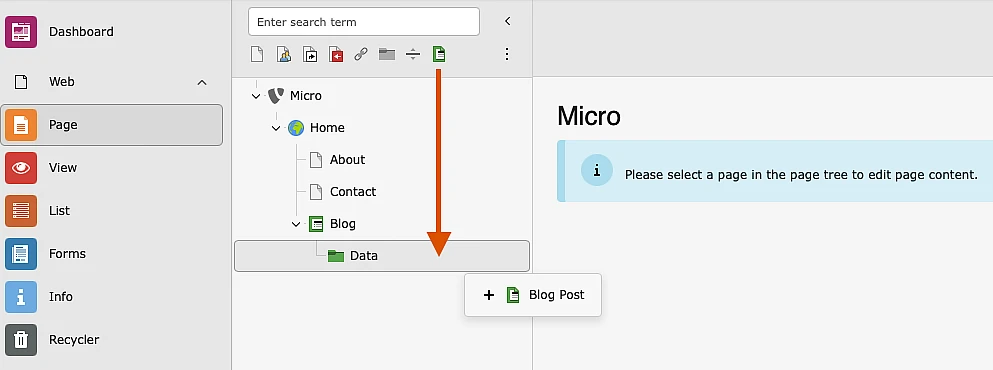
Creating The Data Folder
Drag the folder icon and place it on top / inside the Blog page.
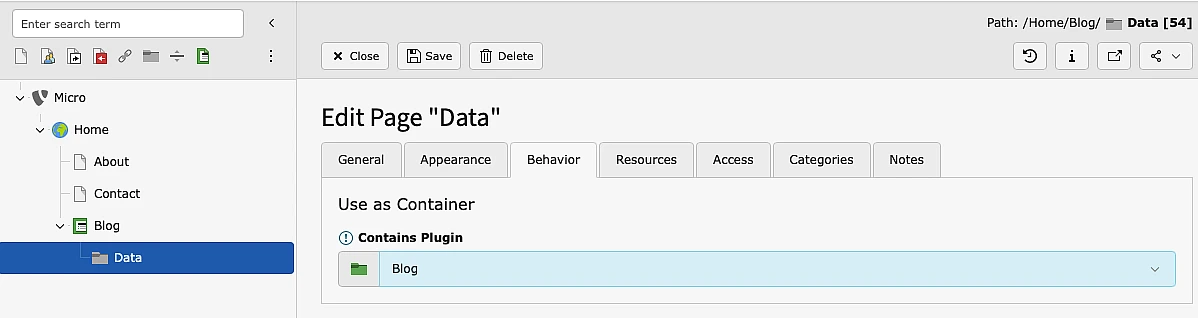
Want to make the folder icon green? Blog > Edit Page Properties > Behaviour > Contains Plugin > Blog.
Creating Categories
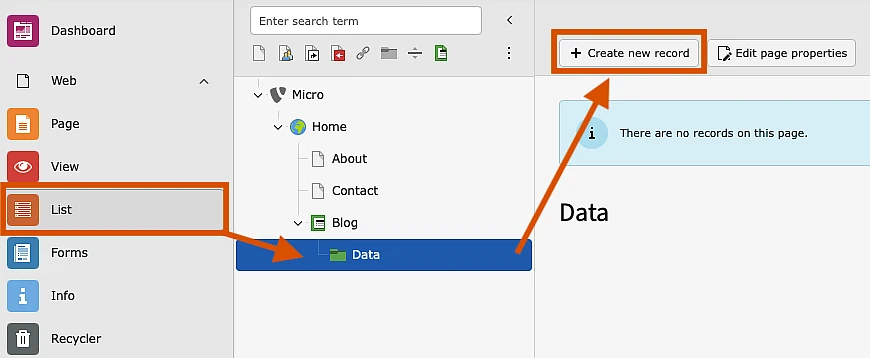
From the List Module, select the Data folder followed by Create New Record.
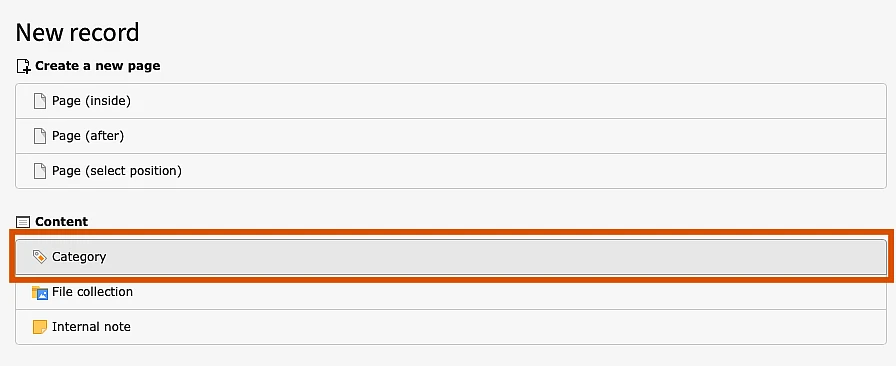
Then select Category.
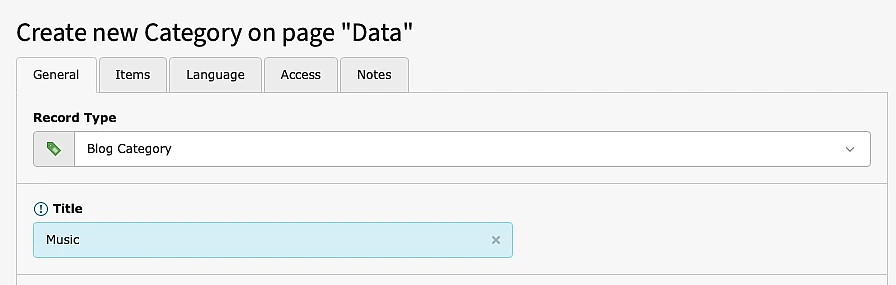
Set the Record Type to Blog Category and give it a name.

Creating An Author
Like Categories:
List View > Data folder > Create New Record > Author.
For my site, I just need one author, me. It's a useful way to share links to your social media profiles and carry a short description about yourself. At the very bottom of this guide is a great example of the Author feature.
Creating The Category And Archive Pages
Next I need to create two Pages of type Blog Page (like we did for the parent Blog page earlier on). One called Category and the other Archive.
Telling The Blog Extension Where Everything Is Stored
We now have a parent blog page which will display a list of our most recent blog posts. We have a dedicated folder that contains a list of blog categories, authors and blog posts. And finally we have two blog pages, one to view our categories and the other to view old blog posts.
We now need to tell the Blog extension where we store our blog posts, categories, authors, comments, etc.
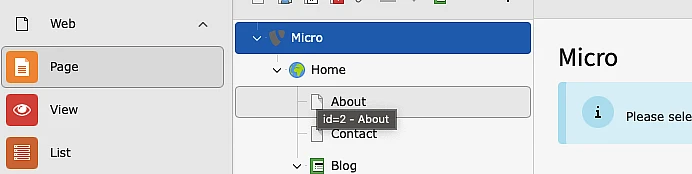
We need to add a small amount of TypoScript that tells the Blog Extension where we store things. Each of the options below points to a number. These numbers are Page IDs. Every item you see in the Page tree has an ID. For example, The Root Page in my page tree has an ID of 1. To find out the Page ID for an item in the tree, just hover the cursor over an individual page icon.
TypoScript > Root Page > Edit TypoScript Record > Edit the whole TypoScript record
From the General tab, we need to add the following to the Constants field:
#Page ID for the List view (Blog Page)
plugin.tx_blog.settings.blogUid = 53
#Page ID for the Data folder where blog posts are stored
plugin.tx_blog.settings.storagePid = 54
# Page ID for the Data folder where categories are stored
plugin.tx_blog.settings.categoryUid = 54
#Page ID for the Data folder where authors are stored
plugin.tx_blog.settings.authorUid = 54
#Page ID for the Archive page
plugin.tx_blog.settings.archiveUid = 59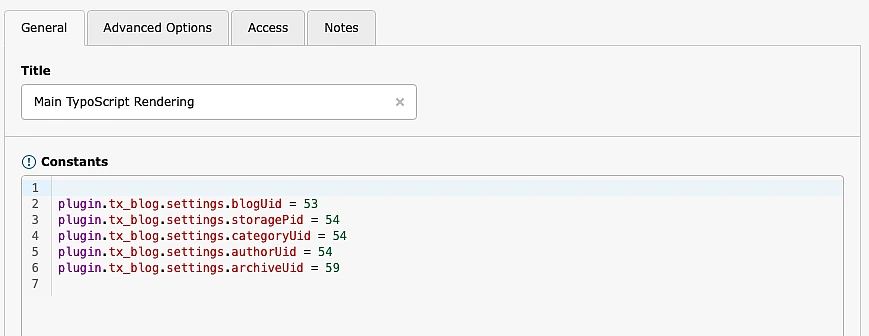
Blog Posts
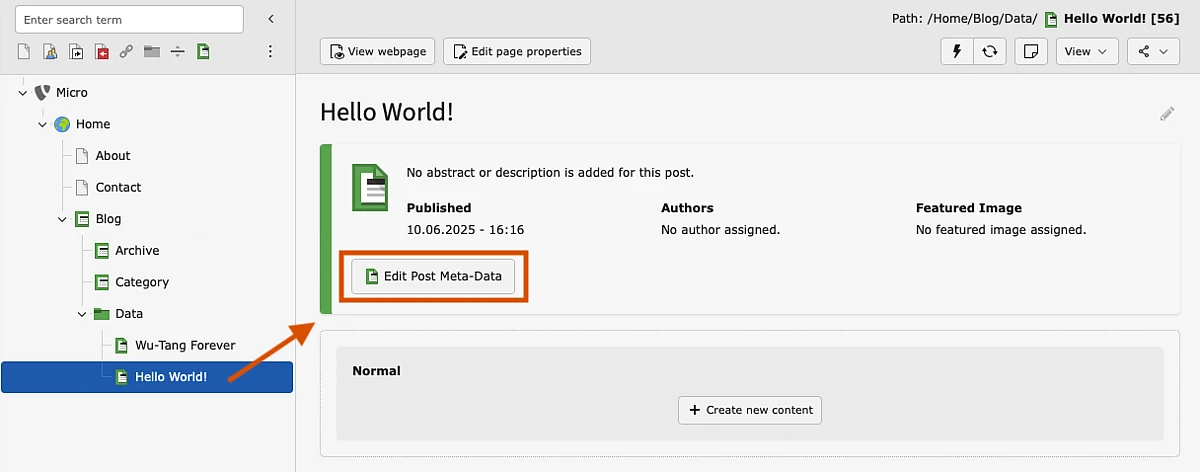
To create your first blog post, drag the Blog Post icon into your Data folder and give it a name.
Once you’ve added your blog post you can start adding meta data to it, and more importantly start adding the actual content of your blog.
Blog Meta-Data
Select a blog post and select Edit Post Meta-Data
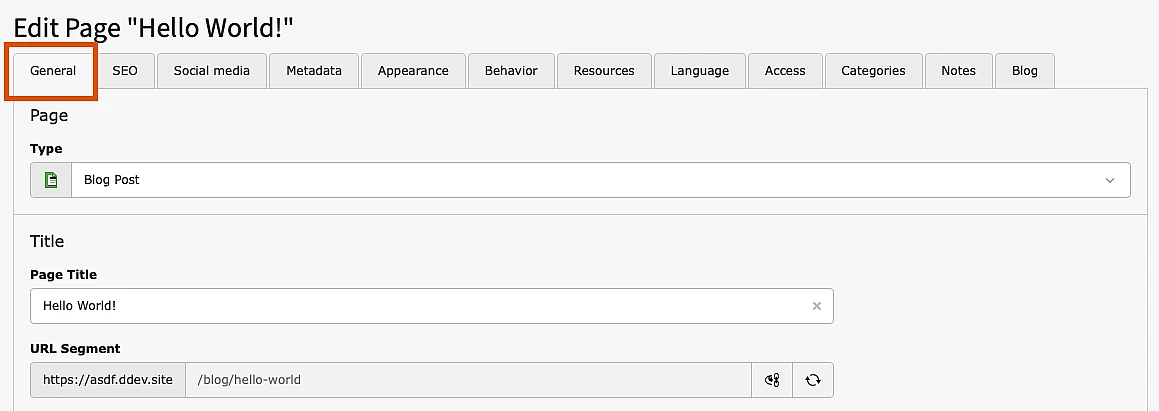
General
From the General Tab we can change the blog posts title, if you do change the title don’t forget to reload the URL segment.
SEO & Social Media
The SEO and Social Media tabs are fairly self explanatory, from these respective tabs we can add information for both search engines and social media platforms.
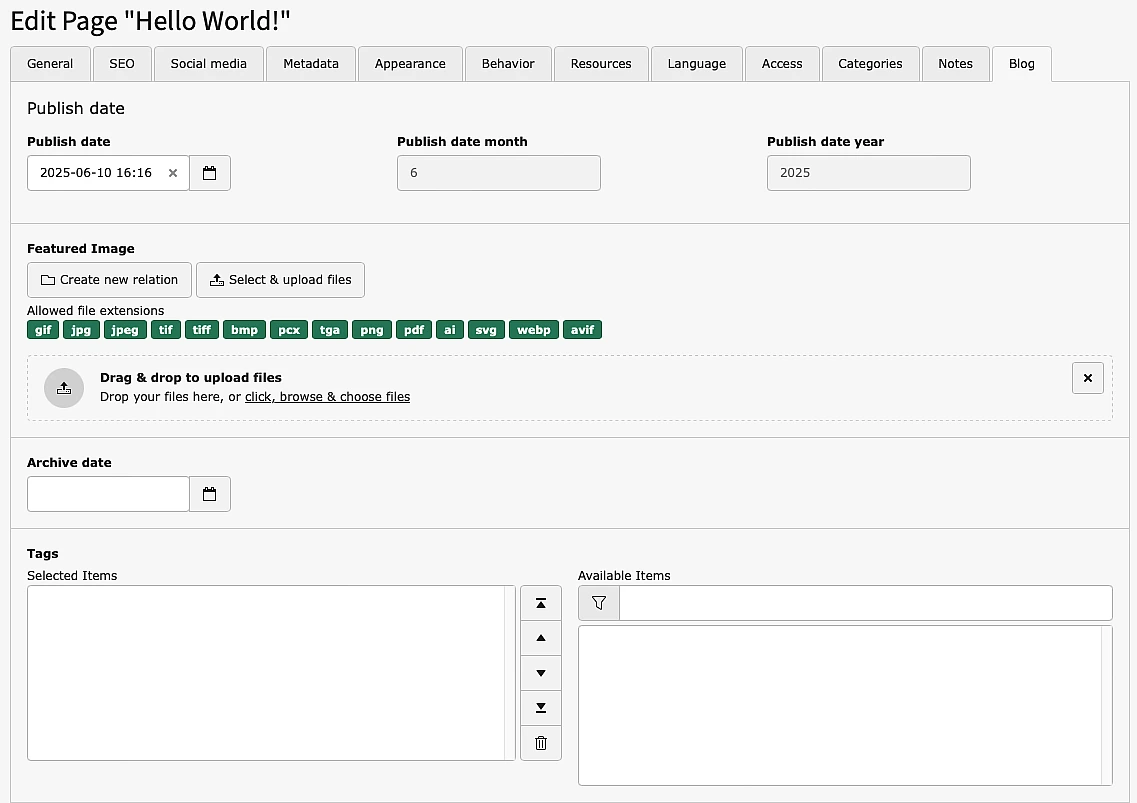
Blog
The Blog tab, unsurprisingly, is the most useful tab. From here we can:
- set a publish date
- add a featured / background image
- set an archive date
- add tags if they are set up
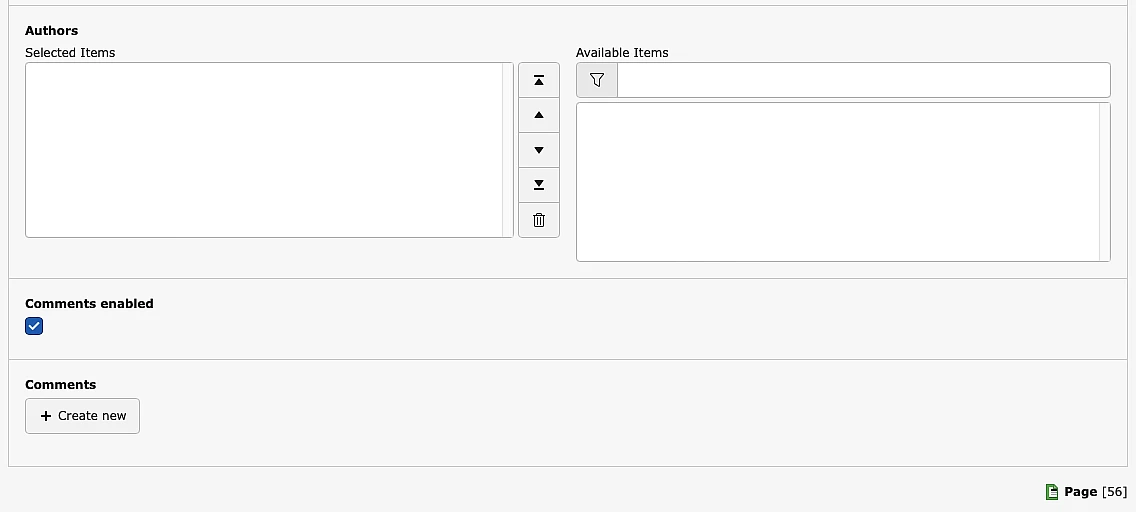
We can also:
- Assign an author or even multiple authors
- Enable or disable comments
- Add comments to a blog post

Plugins! And Lots Of Them
We are now ready to start displaying blog entries in the front end of our site. TYPO3 extensions, like the Blog Extension often contain a number of different plugins that perform specific tasks.
Depending on how we want to display our blogs will determine what plugin we will use. For example, if we only want to display three of our most recent posts on the homepage, we’ll probably want to use the Latest plugin. On the Archive page, we’ll want to use the Archive plugin.
To add a plugin to a page: Page Module > Chosen page > Create new content > Blog
Latest Posts Plugin
On the home page I want to show the three most recent blog posts. The Latest posts plugin is ideal for this. Select the Latest posts plugin and add it to the page.
From the Plugin tab, we don’t need to specify a Storage folder as we did that earlier when we add our TypoScript constants.
By default, the Latest plugin will show the three most recent blog posts. To change that value, add this to your TypoScript Constants and set a new limit:
plugin.tx_blog.settings.latestPosts.limit = 6
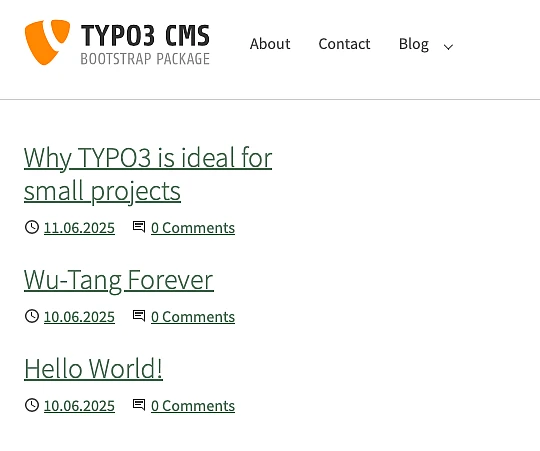
List Plugin
On our Blog page, we’ll want to list our blog posts, for this we will use the List plugin. By default the List plugin will show ten posts per page with pagination.
Archive & Category Plugin
Remember the Archive and Category blog pages we created earlier? We need to add plugins to each of these pages using the Archive and List by category plugins.
All Done
And that’s it for this guide. In Part 1 we looked at installing TYPO3 v13 with SQLite. In Part 2 we installed and configured the Bootstrap Extension so that we could customise our site's theme and make use of the extended content elements that ship with the extension.
If you have any feedback or questions please reach out and thanks for stopping by.
